Simple guide showing how you can connect data from SMOC to Other apps such as your favorite CRM or eCommerce system. New and changed customer objects are exchanged.
Get the Zapier Integration
If you do not have a Zapier account, you need to create one first in order to use this integration
Currently, you can only get access to Zapier via an invitation link, so just send us a message if you want access.
When you have gotten access, you can start creating your zap!
Add your SMOC account to Zapier
To use this integration you need to sign in with your SMOC email and password after adding the integration to your account so we can get the data that belongs to you.
You can do this by going to My Apps -> Custom Integrations -> Add Connection
Create a Zap
When looking at your Zapier dashboard, simply click the “Create Zap” button in the top left to start the zap creating process.
Give it a fitting name that explains what the zap will do, for example Create a new contact in Hubspot on new contact from SMOC
Choose app & event
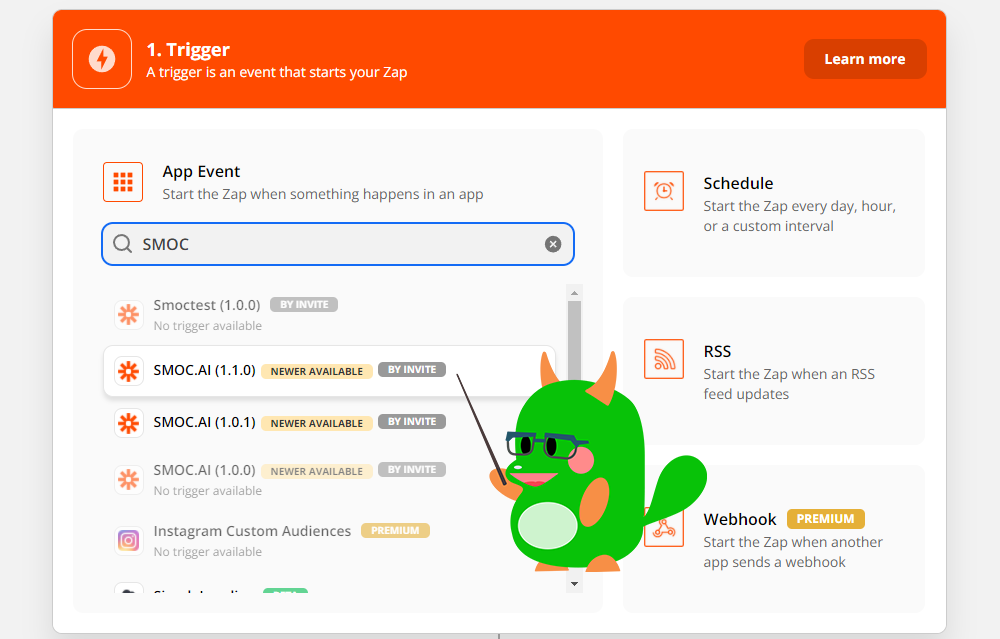
To use the SMOC integration as a trigger, simply search for SMOC and select the newest version
When you have selected SMOC as the trigger source, select “New Contact” as The trigger event, and click Continue.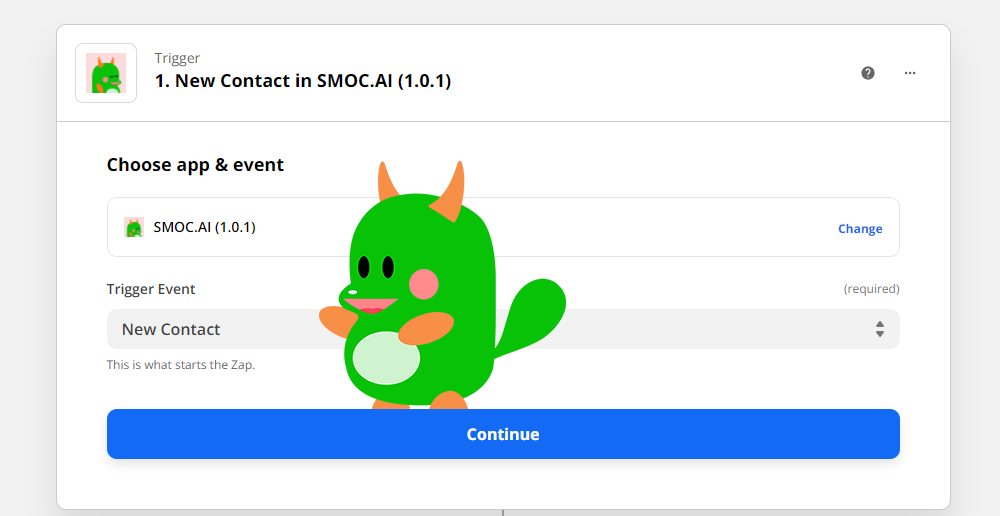
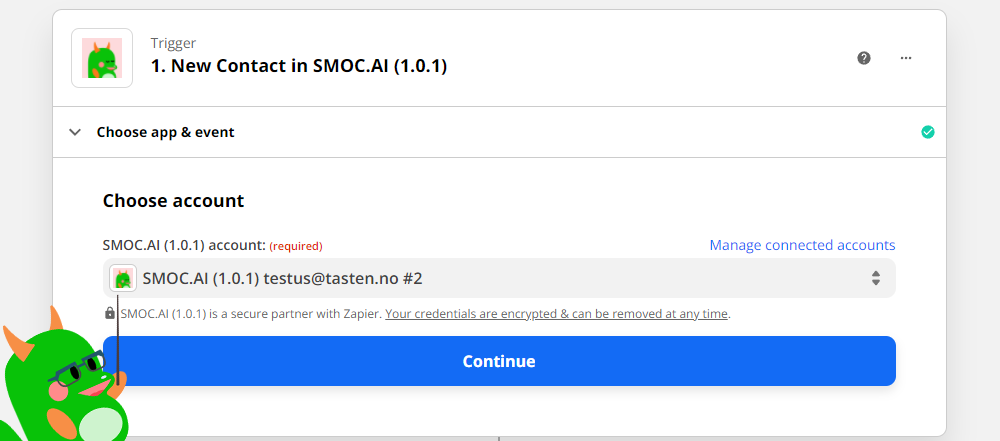
Choose account
Next you’ll have to select the account you added previously, and if you skipped that step you can connect a new account here.
Test the trigger
Zapier will now test the trigger to make sure the right account is selected and the trigger is set up correctly, simply click the test trigger button and wait for the result.
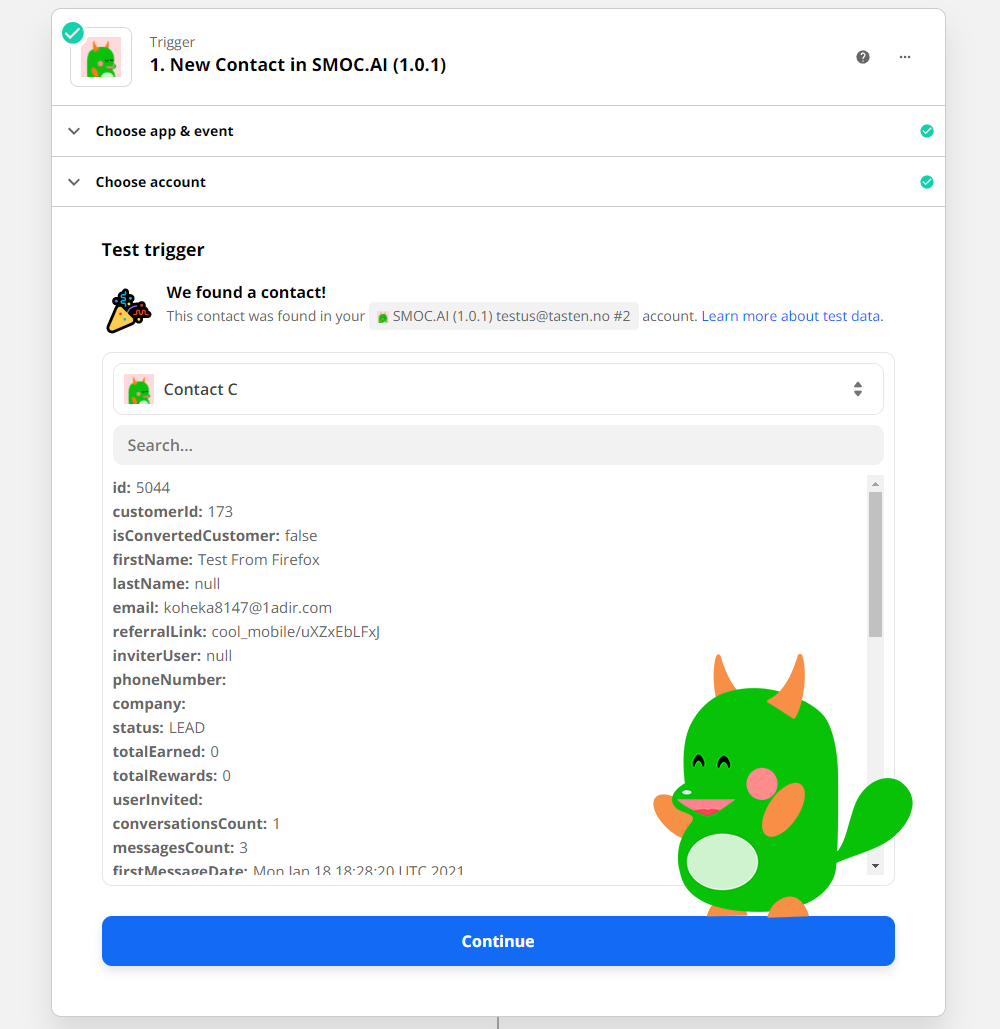
If everything works, great! Then you can continue onwards to add the Action that this zap will take when it’s triggered, if not, make sure you have added the correct account and that there are at least some contacts existing already on your SMOC account so Zapier has something to fetch.
What data does SMOC deliver?
Before you decide what to do with the data you get from smoc, it’s important to understand
what data you can get, so you can make a more informed decision, under is a list of every piece of data you can get from a new contact, and what type it is:
|
Name |
Description |
Type |
|
Company |
The company this user belongs to |
String |
|
Number of conversations |
Total amount of conversations this user has had |
Number |
|
Created at |
Date when the user was created |
Date |
|
Customer Id |
Unique id for the user for this specific company |
Number |
|
|
Email of the user |
String |
|
First message date |
First time a conversation message was registered |
Date |
|
First name |
First name of the user |
String |
|
Last name |
Last name of the user |
String |
|
ID |
User id of the user |
Number |
|
Invited By |
if the user was invited by another user, the id of the inviter will be listed here |
Number |
|
Convert status |
Is the user converted or not? |
True/False |
|
Last message date |
Last registered date of a message sent by the user |
Date |
|
Total message count |
Total amount of messages sent by the user |
Number |
|
Phone number |
Phone number (if any) |
String |
|
Referral link |
Last registered referral link for the user |
String |
|
Status |
Lead/customer status |
Lead/Customer |
|
Total earned |
total amount the user has earned (In NOK) |
Number |
|
Total rewards |
the total amount of rewards the user has earned |
Number |
|
Updated at |
When the user was last updated in our system, this is what triggers the zap |
Date |
|
Invited Users |
List of every user this user has invited |
List containing other users |
|
Name |
Full name |
String |
|
User Flows |
List of every flow the user has participated in |
List of flows |
|
Referral links |
List of every referral link registered to this user |
List of links |
|
Survey Questions |
List of every survey question this user has answered |
List of survey questions |
Data object
If you rather want to see how the actual object looks like, it currently looks like this:
data: {
      company: "string",
      conversationsCount: 0,
      createdAt: "2021-08-24T08:22:00.593Z",
      customerId: "string",
      email: "string",
      firstMessageDate: "string",
      firstName: "string",
      id: "string",
      inviterUser: "string",
      isConvertedCustomer: true,
      lastMessageDate: "string",
      lastName: "string",
      messagesCount: 0,
      phoneNumber: "string",
      referralLink: "string",
      status: "string",
      totalEarned: 0,
      totalRewards: 0,
      updatedAt: "2021-08-31T06:22:50.593Z",
      userInvited: [
        {
          createdAt: "2021-08-31T06:22:50.593Z",
          email: "string",
          id: 0,
          name: "string",
          updatedAt: "2021-08-31T06:22:50.593Z"
        }
      ],
      flows: [{}],
      shortlinks: [{}],
      surveyquestions: [{}]
    }
Connecting to a CRM
There’s a plethora of different things you can do with the data you get from Zapier, but we assume that first and foremost you want this data sent to a CRM system so you can keep track of all your new contacts.
Most CRM’s already have documentation on how to use their integrations, but we will provide simple guide here on how we recommend you to use the data from SMOC to create or update contacts.
Both the integration and these docs are a work in progress, but we’ll keep on adding
new features improve the quality of the documentation!
.png?height=120&name=Logo%20(9).png)